

When Adobe started announcing some of the new features of the CS5 version of Photoshop they showed the Puppet Warp tool in which they played with an elephant's trunk. I was really impressed with that tool but never used it that too much, because of that I decided to give it a try, especially after seeing a screen cast with Russell Brown in which he was showing how to manipulate a rope with the Puppet Warp Tool.
So in this tutorial I will show you how to create a text effect using a photo of a rope and the Puppet Warp tool. This tutorial will only work with the CS5 version and I believe it won't take you too much time.
Step 1
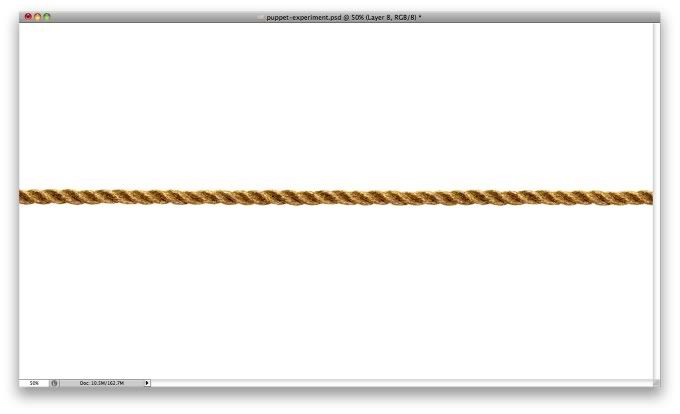
Open Photoshop and create a new document. I'm using 2560x1440 pixels for the size. After that import a photo of a rope. The one I used is courtesy of Shutterstock and you can find it here.
Step 2
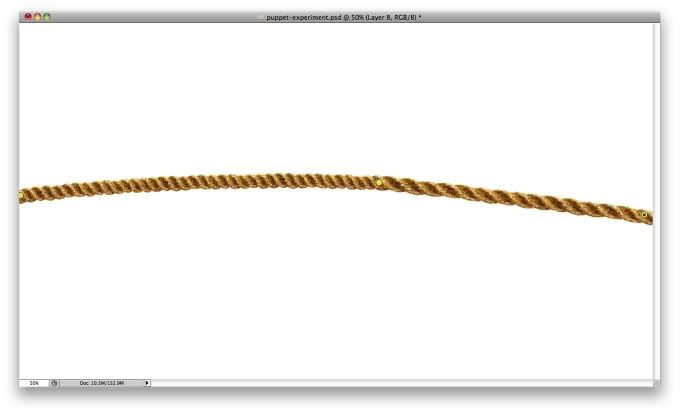
We will be using the Puppet Warp tool to create our text effect, but to make it work properly the rope has to be really long. You will also have to extract the background of the layer, leaving just the rope. After that go to Edit>Puppet Warp. The default mode will show a mash over your object, to hide it just deselect the Show Mesh option.

Step 3
Now start adding points or joints, I don't even know how to call those things. As you can see in the image below, I added one at the beginning of the rope and one at the end. Start moving them around to see how they behave. Tips, if you hold ALT you can rotate the point, a little circle will show so you can use it as a controller. Also if you click on the point holding ALT you will delete it.
Step 4
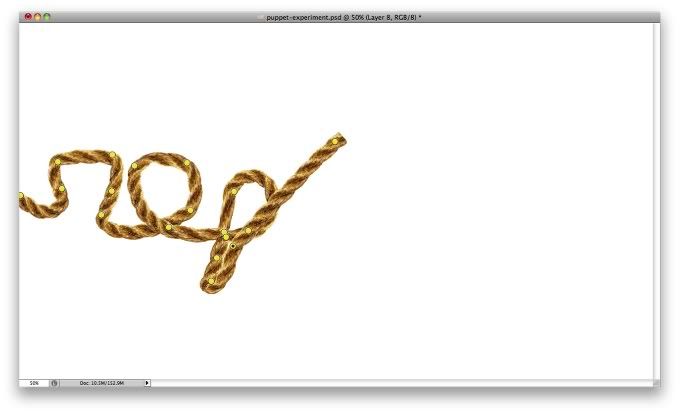
Start creating your word, below you can see the R of rope.

Step 5
Keep editing, it takes quite some time to get used to how things work, it's important to not stretch the rope too much otherwise it will distort the image.
Step 6
Another really cool feature with the Puppet Wart is that you can change the order of the mesh in terms of depth, it's quite impressive how they do that but for example you can define with part goes on over the other using the Pin Depth icons.
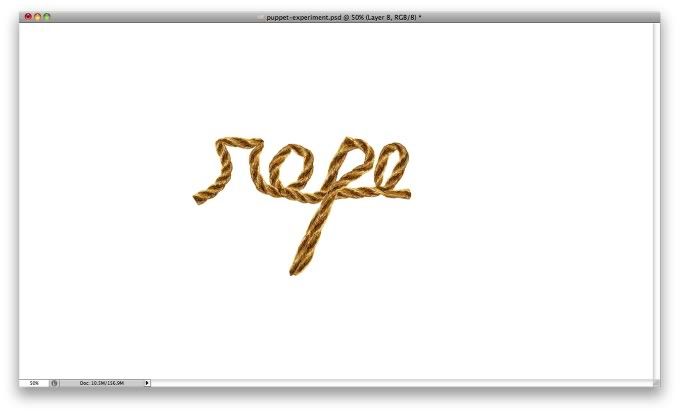
Step 7
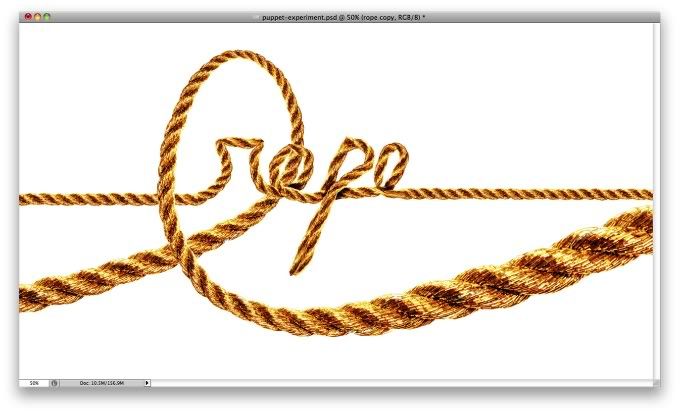
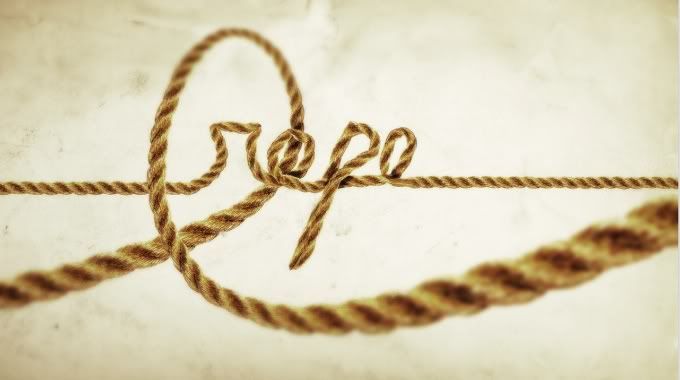
After a few minutes moving the points I got a quite convincing result for the word ROPE.
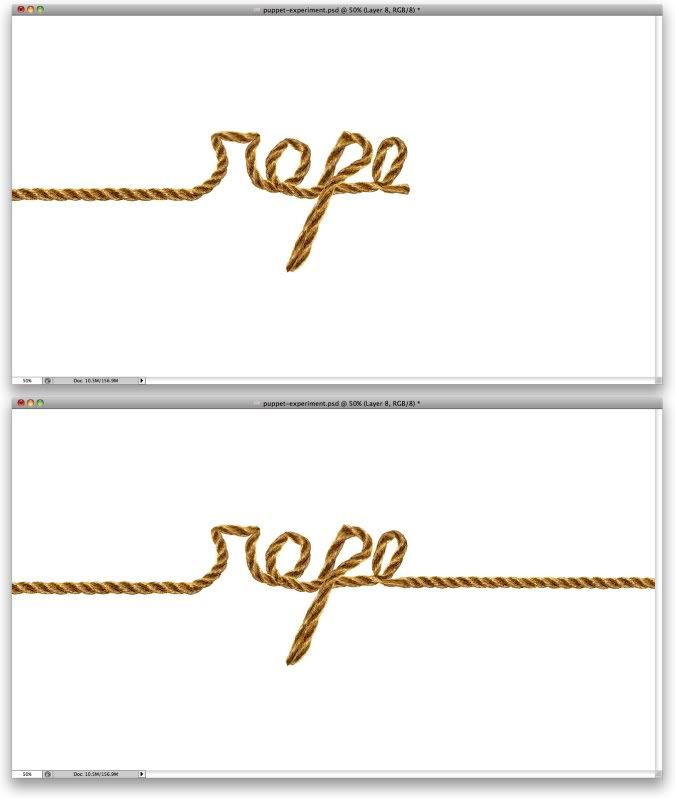
Step 8
Import the rope image again and connect it with the R, then do the same with the E.
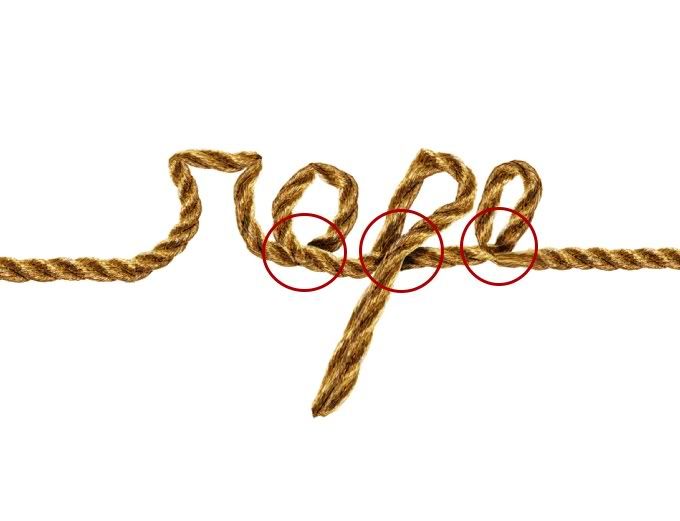
Step 9
Add a new layer on top of the others and with the Brush Tool (B) use a very soft brush with black, paint the areas marked below to create some shadows. Group this layer into a folder and change the Blend Mode of the folder to Color Burn at 50% Opacity.
Step 10
Group all layers and duplicate the group, then with the duplicated group selected go to Layer>Merge Group. Change the Blend Mode of the group to Overlay.
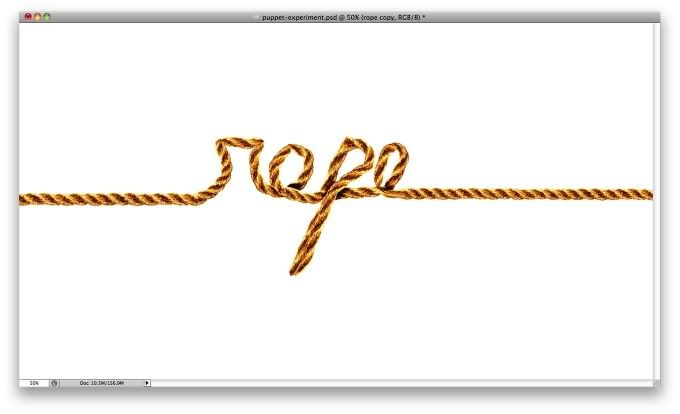
Step 11
Using the rope image again, create another effect using the Puppet Warp tool.
Step 12
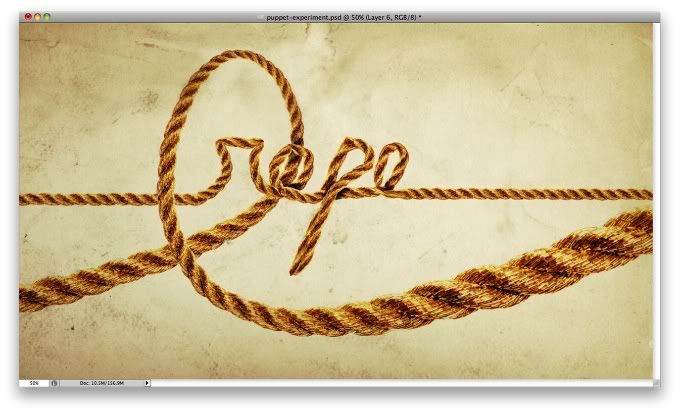
Import a paper texture and place on top of the other layers. The one I used is from Shutterstock and can be found here.
Select all layers but the paper texture, then group them. After that duplicate the group, select this new group and go to Filter>Convert for Smart Filters.
Select all layers but the paper texture, then group them. After that duplicate the group, select this new group and go to Filter>Convert for Smart Filters.
Step 13
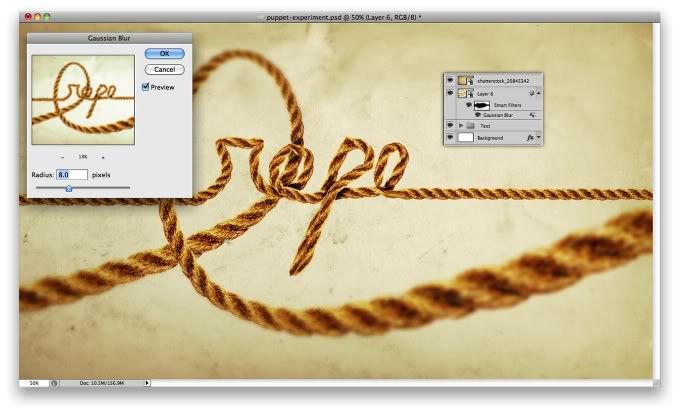
With the Smart Object layer selected go to Filter>Blur>Guassian Blur. Use 8 pixels for the Radius. One cool thing about Smart Filters is that they behave like masks, there is a white thumbnail next to the Smart Filter sub layer that is like a mask, everything that is white gets the filter, what is black doesn't and the grey scales areas the filter is less strong. This is perfect to create a sort of depth of field effect.
With the Brush Tool (B) and a very soft brush, paint of the ROPE word area with black and also the whole rope that connects the word. Use the image below for reference.
Step 14
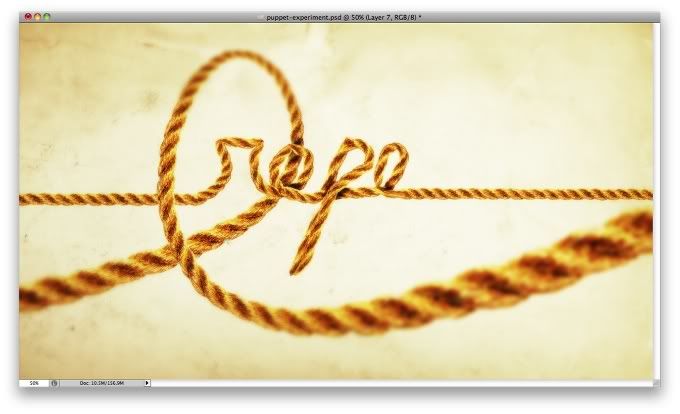
Select all layers and duplicate them, after that merge the duplicated layers and go to Filter>Blur>Gaussian Blur. Use 15 pixels for the radius. Duplicate this layer, so you will have 2 blurry layers. The one at the top use Screen for the Blend Mode at 50% Opacity and the one beneath use Overlay for the Blend Mode with 50% of Opacity as well.
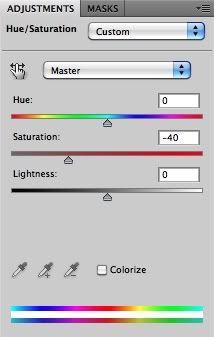
Step 15
Go to Layer>New Adjustments Layer>Hue and Saturation. Reduce the Saturation to -40.
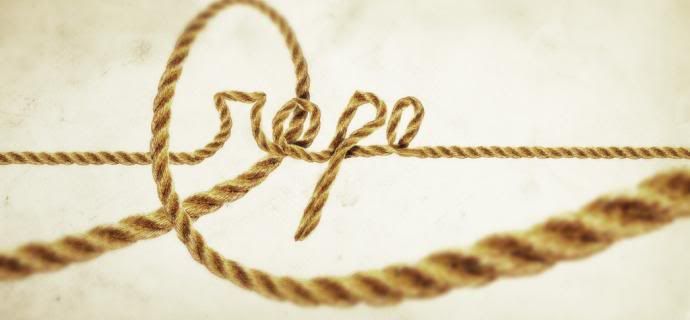
Conclusion
The Puppet Warp tool is an incredible tool which shows an incredible technology behind it, like there are some things that are quite mind blowing such as the changing depths of the mesh. This tutorial was just an example of how to use it to create a text made out of rope. Now it's up to you to come up with much cooler ideas.


0 komentar:
Posting Komentar
Banyak tanya Banyak bingung banyak bata.. :D